The measure of quality: Malben
Engineering’s metrology laboratory is
the heart of data-driven production
consistency

Although pressing and welding have been at the core of Tier 1 automotive supplier Malben
Engineering for 50 years, it is the companyʼs investment in its state-of-the-art metrology
laboratory which, alongside these services, has set it apart, says Plant Manager, Jithin
Kottikkal.
“The metrology laboratory – which effectively analyses the ‘pulse rateʼ of the entire plant
supports the production process and determines overall production compliance by providing
the data which, quite literally, sets the company free,” Kottikkal explains.
This expression – ‘the data sets you freeʼ – perfectly encapsulates the companyʼs data-driven
approach to ensuring that each completed part fully meets the stringent safety and dimensional
accuracy standards of its original equipment manufacturer (OEM) customers; as well as the
companyʼs own even more stringent in-house requirements.
Kottikkal adds that whereas, in the past, prototype parts and tools were made and tested,
todayʼs software and scanning technology not only reveals if anything is out of specification
within minutes, but confirms if reverse-engineered modifications will work.
Investing in consistency
Metrology and Welding Quality Systems Head Cheslyn Reid explains that Malbenʼs investment
in statistical process control (SPC) ensures the consistency of metal pressings: “OEMs
assemble using robots and cannot accept components which vary from their tight
specifications and tolerances. The same goes for the sophisticated welding robots responsible
for Malbenʼs sub-assemblies.
Pressings are tested every 15 minutes using component-specific measuring jigs designed
around locator data (LD) files provided by customers. Customer-specific level 1 and 2 points are
identified to ensure that their specifications are met. Level 3 and 4 points are then added to
complete Malbenʼs own SPC checks,” he explains
Reid advises that Malben insists on using more points than typically used by others: “We would
rather spend a little longer checking a part. We place a lot of emphasis on stabilising pressings,
focusing on variation reduction and aiming for repeatability. We track all material variances
including mechanical properties – to drive press set-up consistency and ensure repeatability.”
Should a problem be detected via the checking fixture, a component is immediately sent to the
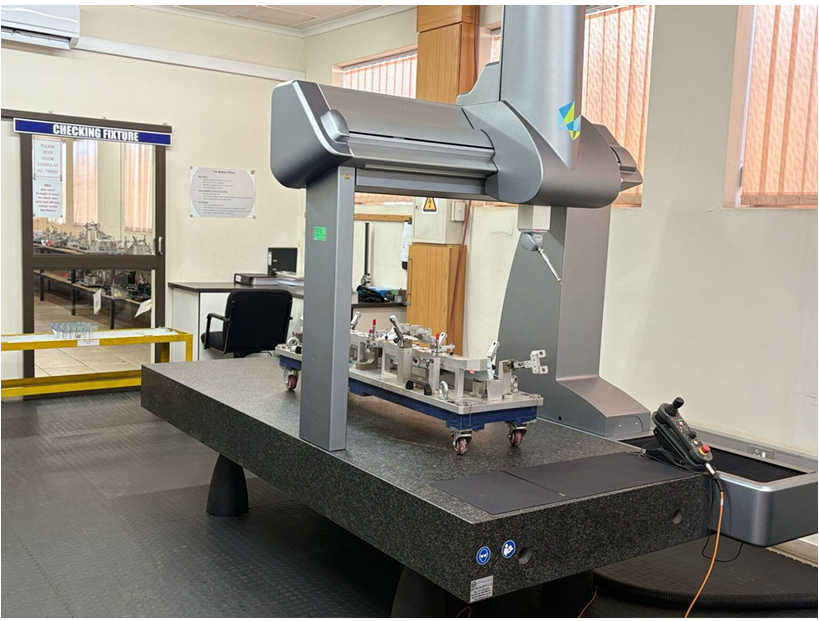
metrology laboratory, which is equipped with CNC-controlled profile measurement systems
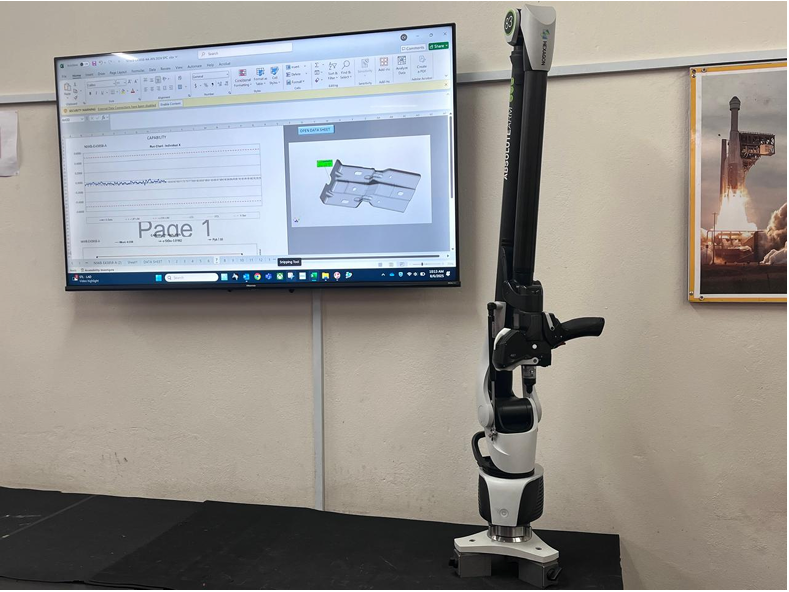
as well as two 3D blue light laser point cloud scanners.
Investing in speed
The super-fast scanners can scan up to 1.2 million points per second in a straight line. Unlike
comparable equipment, they do not need to be pre-prepared and marked before analysis: “We
can pick up our equipment and ‘go for goldʼ immediately! We can scan smaller components in
the laboratory – and larger components measuring up to 5 metres long in the tool room – as
these scanners are fully portable. We leapfrog by setting up the arm, scanning a section and
then moving on to the next segment. Within just four minutes, precise and accurate data is
available.”
He adds that Malben has also invested in software that enables reverse engineering: “If a tool
breaks or cracks, we scan the tool. We have the software to reverse engineer and manufacture
the same section of a tool that needs to be replaced.”
The scanning process creates a software mesh of the physical part, which is then compared to
the CAD model to identify potential problems and make adjustments.
Senior Metrologist Clayton Venkanna continues: “The scanners and the CMM (co-ordinate
measuring machine) provide the first data scan, which we overlay onto the CAD model. In this
way, we complete a dimensional analysis using colour maps to define a deviation from the CAD
model. The colour map visually enables us to check real-time data, and plot from part to part.
We can see the specific point where the last part ran, and where we are currently running.”
For Reid, it is important to understand the process capability which delivers a consistent part,
taking into account any deviations while also ensuring that even these remain consistent
throughout entire production runs. Shifts indicate that something important has changed in the
process.
Speed is also critical, adds Venkanna: “Presses run at up to 20 strokes per minute. You cannot
keep a press standing waiting on the results. Immediate action and quick responses are critical.
That way, we support our production team faster – which is what sets us apart.”
Investing in data
One of the first component manufacturers to use red light scanners in 2015, Malben had
upgraded to ultra-accurate blue light scanners by 2021. Equipment suppliers provide internal
training and software updates for the highly skilled team operating the laboratory.
“It is not just the machines, but their application and integration into our operational and quality
system which is really important. We use our equipment and technology to its full capacity, to
guide all of our technical decisions and make critical judgment calls,” Kottikkal stresses.
With contingencies in place to cover breakdowns, a CMM which can verify the accuracy of its
blue light scanner counterparts – and staff trained to ensure there are no interruptions to this
vital SPC process – Malben is perfectly equipped to achieve the highest quality standards.
With contingencies in place to cover breakdowns, a CMM which can verify the accuracy of its
blue light scanner counterparts – and staff trained to ensure there are no interruptions to this
vital SPC process – Malben is perfectly equipped to achieve the highest quality standards.
“Investment decisions are driven by the scope of new work that is sourced. We need to ensure
that new equipment is cost-effective and allows us to meet our customer requirements
regarding quality and tolerances,” Reid concludes.


